How to install Geant4 on Linux
- Author: John Francis
- Date: 8/21/2023
- Development environment: WSL (Windows subsystem for Linux, windows 11)
Table of Contents
- Intro
- Installing conda
- Adding conda to path
- Initializing bash for conda
- Creating Geant4 environment
- Dependencies
- Getting a test Geant4 app
- Using CMake to compile the test app
- Running test app
- Debugging
Intro:
Geant4 is a powerful physics modeling toolkit. In this tutorial I will be explaining how to install Geant4 on Linux.
This has been tested in WSL with windows 11 and ubuntu, but it should be similar using any Linux environment.
Installing conda
We are going to use the conda package manager to install Geant4. Conda allows us to activate a Geant4 environment whenever we want to run Geant4.
A good option for installing conda is the lightweight miniconda installer. We can install this from the miniconda website by running:
wget https://repo.anaconda.com/miniconda/Miniconda3-latest-Linux-x86_64.sh
If you would like, you can verify the SHA-256 hash code with the code on the Miniconda install page by running:
shasum -a 256 Miniconda3-latest-Linux-x86_64.sh
Now, to install conda, set the correct permissions to the installer with:
chmod +x Miniconda3-latest-Linux-x86_64.sh
And run the installer with:
./Miniconda3-latest-Linux-x86_64.sh
Adding conda to path
In order to use the conda command, you must add the miniconda bin directory to the path environment variable. To do this, run the following command (inserting the correct path to the miniconda3/bin directory)
echo 'export PATH="$PATH:/<path-to-miniconda3-dir>/miniconda3/bin"' >> ~/.bashrc
source ~/.bashrc
Now that conda has been added to the path variable, we can install Geant4.
Initializing bash for conda
Before anything, we have to initialize bash for conda, that way we can run commands.
conda init bash
We need to close and re-open the shell for this to take effect.
To close, run:
exit
Creating Geant4 environment
First, we want to make sure we have the conda-forge channel. This channel has geant4 and several other dependencies we will need later. To get the conda forge channel, run:
conda config --add channels conda-forge
To create a geant4 environment, we can run:
conda create -n geant4env
The name “geant4env” is simply the name of our environment.
To activate and deactivate the environment, we can run:
conda activate geant4env
conda deactivate
For now, we want the environment activated.
conda activate geant4env
Now, let’s install geant4 in the environment by running:
conda install -c conda-forge geant4
Dependencies
If we want to use Geant4 or compile any Geant4 apps, we are going to need some dependencies. Through the Geant4 forum, and my own testing, I have come up with this dependency list:
Conda dependencies
conda install make \
	cmake \
	compilers \
	sed \
	mesa-libgl-devel-cos6-x86_64 \
	mesa-dri-drivers-cos6-x86_64 \
	libselinux-cos6-x86_64 \
	libxdamage-cos6-x86_64 \
	libxxf86vm-cos6-x86_64 \
	python=3.9 \
	boost=1.72.0 \
	clhep=2.4.4.0 \
	expat \
	freetype \
	libglu \
	qt=5.12 \
	xerces-c \
	xorg-libx11 \
	xorg-libxfixes \
	xorg-libxmu \
	zlib \
	xorg-libxfixes \
	libxext-cos6-x86_64
Apt dependencies
sudo apt install libgl1-mesa-glx /
libxrender1
These dependencies are really important. For example, we have mesa drivers in our dependency list. This suggests that we will be able to use OpenGL for visualization. We also have python on the list, and unix platforms allow python coding with Geant4 which is amazing. Qt is on the list as well, which allows us to use the amazing qt gui.
If you want more information about these dependencies, you can look at my notes.
Getting a test Geant4 app
In this tutorial we are going to test our installation by running, “Geant4-Hello-World.” To get Geant4-Hello-World, first navigate to a directory that you want to store the source code in, like “desktop” or something.
Then, we need to make sure we have git installed. Try
git --version
and if you don’t have git installed, install with
apt install git
Now to get the correct version of G4-Hello-World, run:
git clone https://github.com/john9francis/G4-Hello-World.git
And make sure to checkout the correct branch to make sure this works.
git checkout remotes/origin/v0.1.1
Inside the G4-Hello-World dir you should see the following files:
ls
# Output:
CMakeLists.txt
Hello_World.cc
compose.yaml
mac_files
CMakePresets.json
LICENSE
g4_hello_world.png
src
Dockerfile
README.md
include
Make sure we are in Geant4 environment
In these next steps, we are going to build this Geant4 test project, so we need to make sure we are in the Geant4 environment. Get into the Geant4 environment by running,
conda activate geant4env
Then you should see the name of the environment in parenthesis pop up like so:
(geant4env)
Using CMake to compile the test app
Here’s how we use cmake to build this project. First, we need to make two directories, build and install.
mkdir build
mkdir install
Then, we need to copy the path to install for later use.
cd install
pwd
# Output:
# home/path-to-G4-Hello-World/install
Make sure you copy this path.
Next, we need to navigate into the build directory
cd ..
cd build
Then, we run this following command to generate cmake build files:
cmake .. -DCMAKE_INSTALL_PREFIX=home/path-to-G4-Hello-World/install
After the -DCMAKE_INSTALL_PREFIX= option, paste the path to that install directory we copied earlier.
Setting the -DCMAKE_INSTALL_PREFIX= is optional, but reccomended. If we don’t specify an install_prefix and just run, cmake .., it will install some files in the default directory which is somewhere you are going to have to go search for. I prefer to keep all the files in their own folder for organization.
After you generate the build files, run:
make -j 16
This will build the Hello_World target, and the -j 16 specifies that you want it to use “16 jobs.” Basically it splits the work between 16 different threads to build the target much faster. This option is unnecessary for this small project, but for bigger projects it’s very helpful.
Now we want to make the install target by running,
make install
Geant4 Hello World should be completely installed now.
Running test app
The Geant4 Hello World executable is in the build directory, so we can run it from this directory. To run, type the command,
./Hello_World test.mac
And you should see “Hello World” display on the console.
To test the Qt gui, just run,
./Hello_World
And the gui will display like so:
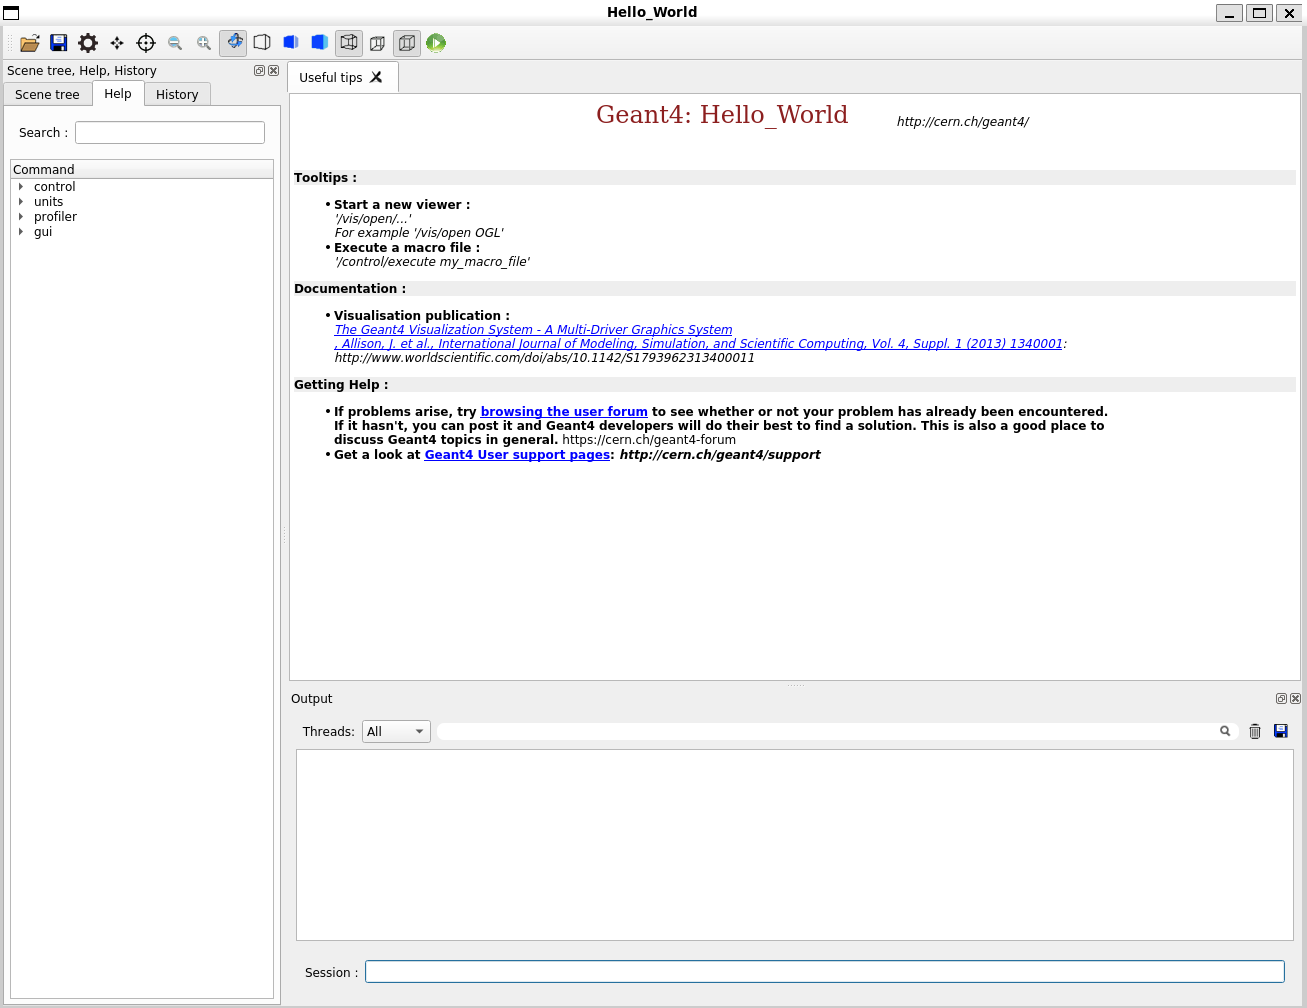
Congratulations, you have installed Geant4 on Linux!
Debugging
The first time I downloaded Geant4 on Linux, I was faced with all kinds of bugs and errors. To see my journey, just read through my notes. Hopefully this tutorial won’t give you trouble, but here are some tips to help you debug if you get errors.
Make sure Geant4 environment is active
Sometimes I didn’t notice that my geant4env was not active when trying to run the test Geant4 applications. This causes issues because the app can’t get linked with the Geant4 dlls, libraries, and source files. So just make sure your environment is active by running,
conda activate geant4env
Delete and re-make environment
If you are still getting errors like “CMake can’t find the OpenGL dir” or something like that, I would suggest deleting the entire Geant4 environment and starting over. You can do this by:
conda deactivate # deactivate the environment if it was active
conda env remove -n geant4env # delete the environment
conda create -c conda-forge --name geant4env geant4 # create environment and install geant4 in a single step
If it still doesn’t work, you may have some missing dependencies.
Install more dependencies If you’re still getting errors building the Geant4 app, you might have some missing dependencies.
If you are getting confusing errors, I would suggest asking ChatGPT what the error is saying, and 9 times out of 10 it’s a missing dependency.